How I Grow Organic Garlic at Home
Late last year, I stumbled upon a pop-up store here in Manila that sells organically grown produce. As I was foraging through their items, a basket of native garlic immediately caught my attention. I was quite astonished to find out that a small bulb of garlic costs around fifteen to twenty pesos a piece. Unlike the imported ones, our local garlic variety has a distinctly strong flavor, such that only a few cloves are enough to savor up any dish. So after buying a few bulbs from this store, I decided to head straight home and start some organic garlic in my small backyard garden.
Starting with a Few Garlic Cloves
In the Philippines, garlic grows best during the dry season, and this typically starts from November until early May. This doesn’t mean though that you can not grow it at any other time, except that you might get smaller bulbs during the rainy days.
You can start sprouting the cloves indoors by arranging them, pointed tip facing upwards, in a small bowl or cup filled with just enough water to moisten the lower tip of the cloves. In about 8-15 days, the cloves will start to germinate; and once the sprouts are about 3 inches tall, they can be transferred to the soil or in container pots.
Another option is to plant the garlic bulbs directly on the ground or potting medium. The garlic bulbs should be buried individually with the pointed tip facing upwards. The depth should be around 1 inch from the surface.
 For bigger bulbs, select only the biggest cloves, while setting aside the remaining cloves for cooking. If you buy garlic in grocery stores, choose a locally grown variety (preferrably, organic). However, most store-bought garlic bulbs have been sprayed with a chemical that retards sprouting, thus making germination difficult. Also, most imported varieties are not ideal for growing here in the Philippines because these varieties have been accustomed to grow in more temperate climates. (There are generally two groups of garlic varieties, the soft-neck and the hard- neck varieties. The soft-neck varieties are the ones that can grow well in warm climates, like ours in the Philippines. As the name suggests, soft-necks have flexible stalks that can easily be tied together in a braid.).
Growing Garlic in Containers
When planting in containers, choose a container with at least 10 inches in depth. Deeper containers are better, because they allow the roots and bulb to form properly, thus producing bigger bulbs. Choose an area with full sun and use mixed sandy/ loamy soil, with lots of organic matter or compost.
 Allow at least 4 inches of space in between each plant. Water the soil once every other day and if grown in a container, place the container in an area with full sun. Garlic can be planted as a companion, together with other non-invasive herbs (like basil) but make sure it gets full sun all the time. Mulch the soil with dried leaves or hay, especially during the hot summer months, to prevent it from drying up. If the soil is either too dry or too wet, the bulbs may not form properly. Make sure to use a well-draining soil to allow excess water to flow out properly. Augment the soil nutrients with lots of organic compost or fertilizer at least once a month, for better and bigger yield.
Harvesting your Garlic
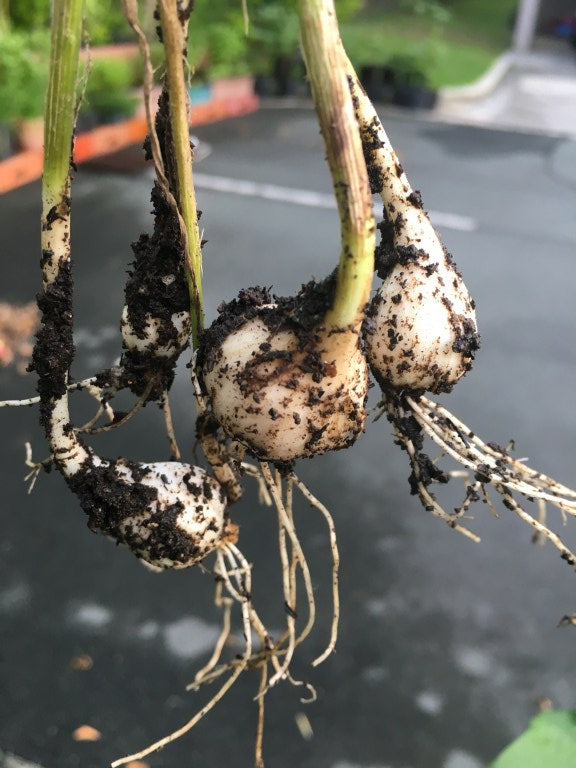
 In another 5-6 months, the garlic bulbs should be ready for harvest. At this stage, some of the outer leaves will turn brown or yellow, signalling that they are ready to be harvested. Using a plastic knife, soften the soil around the roots before gently pulling out the stalk. Be careful not to pull too hard or the bulb might get snapped off. Allow the garlic to air dry for about 2 weeks before using them for cooking.
Happy gardening!