How to Grow Wheatgrass at Home
I’ve heard so much about the benefits of wheatgrass juice. Some claim that it boosts immunity, kills harmful bacteria in the digestive system and rids the body of toxic wastes. It’s supposed to provide a high concentration of nutrients, amino acids, chlorophyll and vitamins A, C and E, as well as iron, calcium and magnesium. In the Philippines, wheatgrass is generally available commercially in ready-to-drink powdered form. Alternatively, you can also grow your own wheatgrass at home and it only takes about 7-10 days to prepare and harvest this amazing weed.
How to grow your own wheatgrass at home
What you will need
 First, you will need a couple of recycled plastic (and transparent) trays or containers of about 1.5 – 2 inches in depth. Punch a few holes at the bottom to serve as drainage outlets for excess water to flow through. You will also need vermiculite or some loose soil-less potting medium. This is usually available in most garden shops. And lastly, the wheat grass seeds. Ideally, about a cup of seeds is sufficient for one week’s serving of wheatgrass juice.
Day One
Soak the seeds in water overnight or at least 12 hours.
Day Two
Fill the recycled container trays with vermiculite or soil-less potting mix up to about an inch in depth. Spray the potting mix with water until the entire bed is moist (not soggy). Make sure that the water or moisture reaches the bottom part of the container.
 Spread a layer of seeds on top of the the soil or potting medium. The seeds should be evenly spread out and should not be stacked on top of one another. Cover the seeds with another layer of potting mix. Spray again to moisten the top layer.
Place the container under indirect sun (by the window or in a slightly shaded area). Wheatgrass thrives best in mild weather conditions which are neither to hot nor too cold.
Day Three to Day Six
The potting medium must stay moist at all times. Spray with water once a day, or more often, if needed. To prevent molds or fungus build-up, mix a teaspoon of hydrogen peroxide per half liter of water and use this to spray the roots portion once a day.
Day Seven to Day Ten

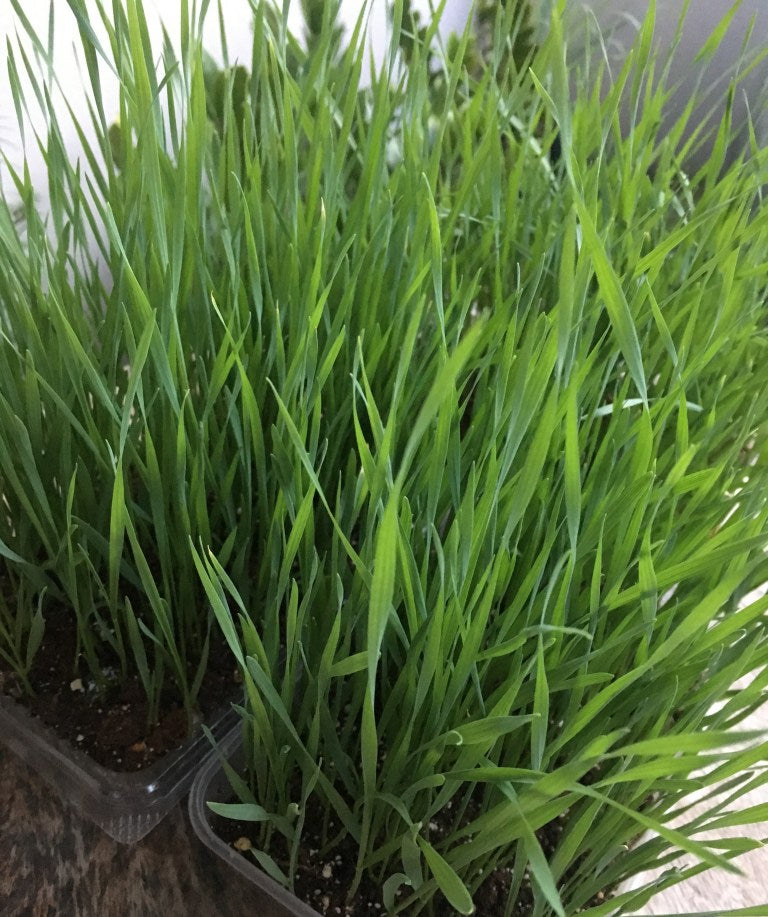
When the leaves are at least 6 inches tall, they are ready to harvest. Cut off the leaves leaving about an inch from the bottom part. The harvested leaves can be stored in resealable plastic bags and placed in the refrigerator. They can last for up to 2 weeks or more when stored properly.
Do not discard the remaining root section in the tray because you can re-grow them up to at least 1 more growing cycle.
Preparing the wheatgrass juice
Wheatgrass is best prepared with the use of a juicer or juicing machine. In the absence of a juicer, you may use any regular blender. Cut the leaves into small strips and then add about a cup of potable water into the blender or juicer. Use a strainer to extract the liquid from the remaining fiber.
Here’s the caveat: If you intend to drink this juice everyday, growing your own wheatgrass may not be ideal for busy gardeners like me. It’s better to just buy the powdered form which can simply be dissolved in water and you can prepare the juice instantly. The cost difference between growing your own wheatgrass and buying the powdered form is minimal, if you consider the effort it takes to prepare the wheatgrass from seeds.
Happy gardening everyone!